How to Enable oEmbed and iframe embeds
We will take you through all the steps involved with and around oEmbed and iframe embed setup in your dashboard.
What is iframe and oEmbed?
Iframes are HTML elements that allow you to include codes from other sources without them interrupting, changing or affecting codes on your own website.
Due to this they are often used by various websites and services to allow you to add some pages from other sources. This of course brings its own difficulties especially if you have some specific requirements around what the content in those pages can do - such as grab the access to camera and microphone.
With this page and options, we will show you exact code that you want to get to allow you everything you want or need.
Now oEmbed is a more trusted way of adding codes to some other services or websites (like Embed.ly, WordPress and many others). The oEmbed is a specific way that allows the standardized way of adding these codes and we support it.
oEmbed can be seen as a technology used to provide more content to some platform about what should happen as well as to pass your own codes.
This page will explain how exactly you can do the same. Even if you will be seeing iframe in most of this help and dashboard, as oEmbed is using iframes, this is using the very same process.
How to Allow Iframe and oEmbed Eembeds
There are few simple steps you would need to follow to enable iframes and oEmbed.
To do this you should:
- Log into your Ziggeo account. You can do that by going here
- Open the application you want to use in your Ziggeo dashboard
- Now click on Manage menu from the same application
- In this location you will see the
Iframe Embedsection that you should click on.
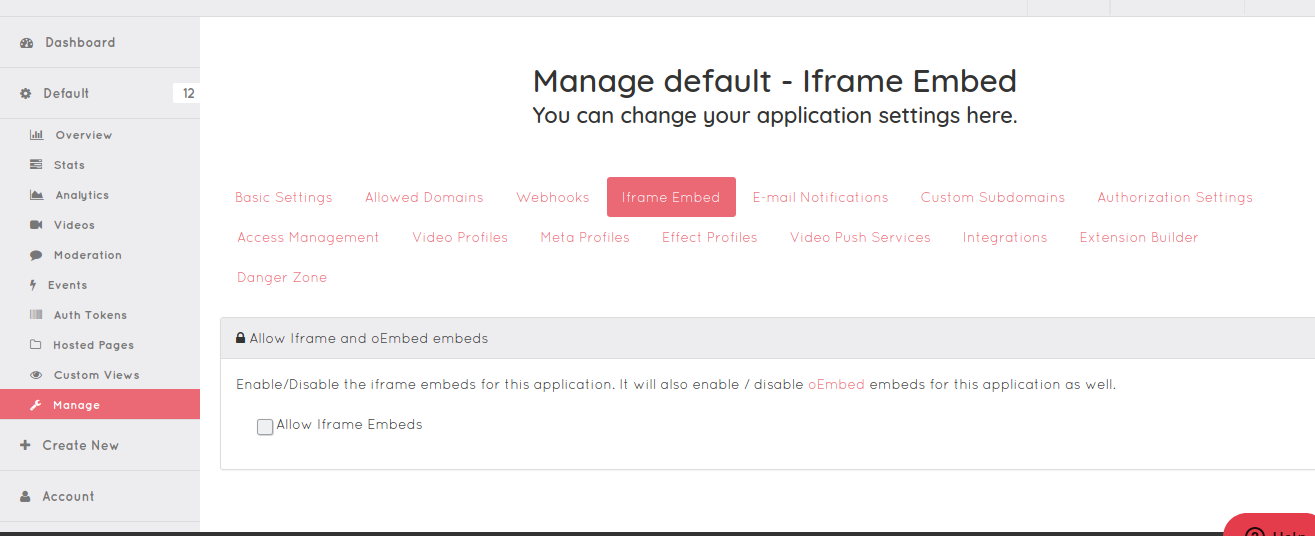
If your iframe embed is enabled you will see it checked out, however if not (by default it is disabled) you will need to activate it first.

Once enabled you will see additional details.
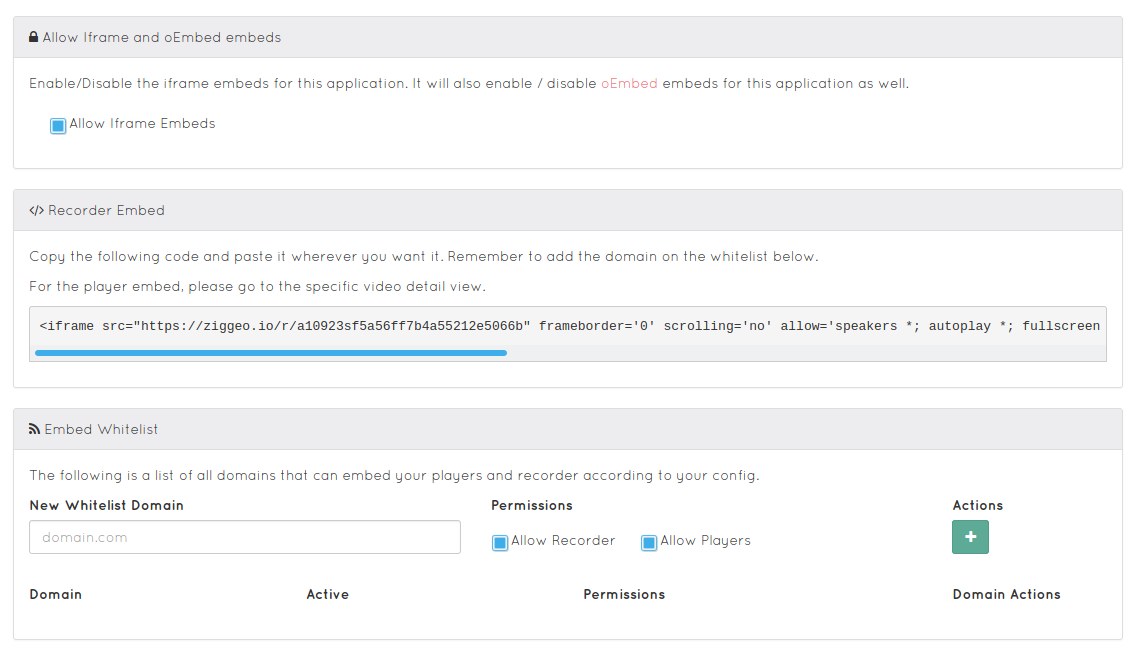
That is it, your iframes and oEmbeds are now enabled. We do however suggest setting up everything per the other sections on this page.
What iframe code to use for oEmbed recorder?
Now once the iframe and oEmbed feature is enabled you can get access to the code you will need to use.
Since this is one time and simple setup, we presume you are already in your dashboard and on the right page as you just followed the steps above.
Now, the recorder code is the first thing that you will be shown. You can and should always go back to this page when you want to grab the iframe recorder code. It will be updated with any new information that might be needed for the iframe to function properly even with new browser vendor changes.
The code is found under Recorder Embed section as shown bellow.

This code pattern is constructed as following https://ziggeo.io/r/APPLICATION_TOKEN
The other code is equally important if you want to support all browser vendors and across different versions, which is why we recommend returning to this page.
Next, we will show you how to make sure that the pages are only allowed on specific domains.
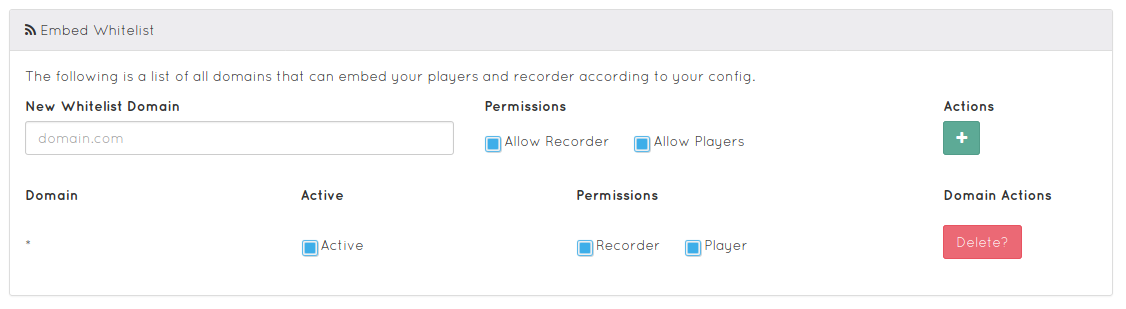
How to limit the domains that can show your iframes and oEmbeds
This part describes how to set up domains and this is available under Embed Whitelist section in your dashboard.

The way this works is that under New Whitelist Domain input (short text) field you would type a domain where you want your iframe and oEmbed codes to work. Now if your website is the only location where it should be run, and your website has a domain like my-domain.tld you would add that: "my-domain.tld" into this field.
Following it you have two checkboxes that allow you to select if you want to allow only playback or only recorder, or both. Depending on what you check will depend what you have available to you.
Now, once ready, just click on the plus button to the right.
For initial setup it is best to set up * (wildcard) under Embed Whitelist. This will allow you to add the code on any website. Once you got everything set up, you can come back and fine tune this further.
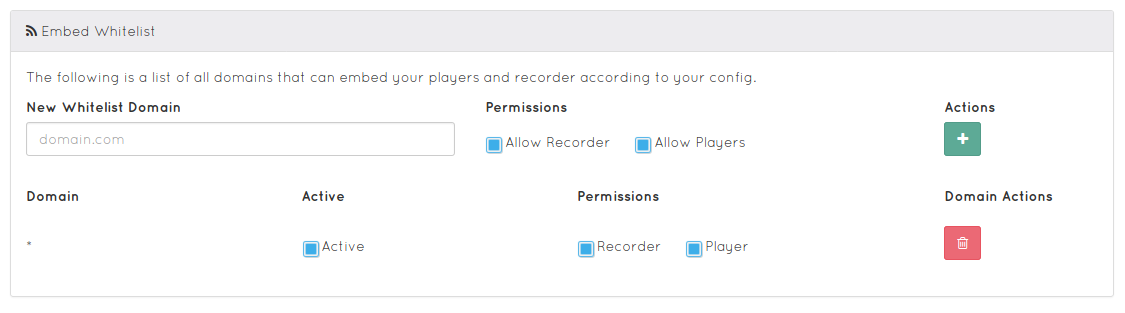
This allows you to quickly set things up and once ready to change the domain to one or more specific domains and make your codes more locked into your own websites.
Remove support for iframe and oEmbed on some domain
Disabling and removing support to a specific domain is very simple to do.
You might need to do this if you have changed your developers company and like to keep things clean / up to date or if you change your domain name.
To temporary disable, you can just uncheck the option and then click on Update button (it will be shown after change).
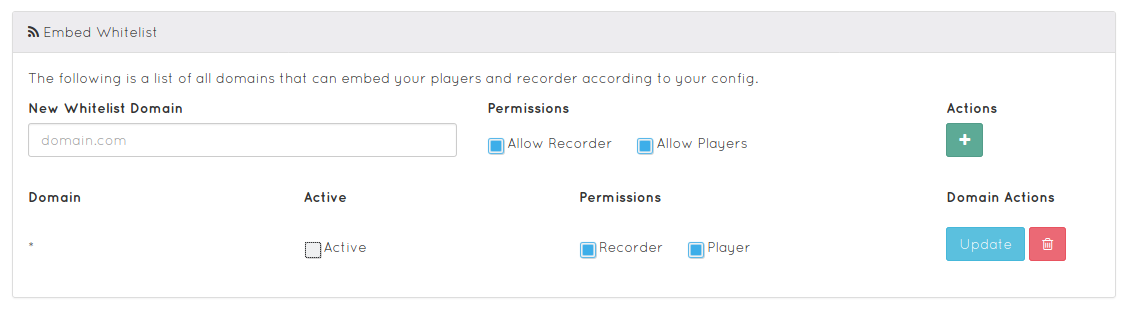
As you do the support for a domain will be immediately disabled.
Once you are ready to turn it back on, just check the box and update and that is it.
The process is very similar for removing of the domain completely. Just find the domain and click on delete button. To prevent accidental removal you will need to wait a moment and then you will be able to click again to confirm removal.
That is it, once done you have removed the support for a given domain and the change is instantly applied.
Please note that leaving it blank / not adding any domains you have enabled support however you did not allow them on any specific domain, so it will not work if left like that.
To make it easier for you and others that are or might be setting up your account it is best to disable the iframe and oEmbed support completely making it easy to spot this is the case.