Speaking New Languages on Your JotForm Forms
Ziggeo's JotForm integration has been created for some time now and it has helped many to quickly and easily capture and show videos through their forms.
It is designed as 2 different widgets - a player and a recorder. You can add both to your form by going to these links:
https://www.jotform.com/widgets/ziggeo-video-player
https://www.jotform.com/widgets/ziggeo-video-recorder
If you have been using our widgets for a while now, you are already familiar with the same. However there are some interesting new things we want to share with you.
Revisions, Revisions
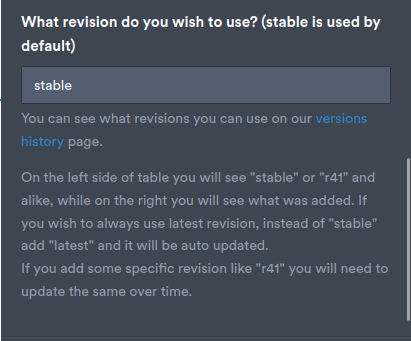
So far your widgets were always using the version of our JS SDK that we tag as "stable". This is great for small teams or generally for teams and organizations that have standard requirements. If you are looking for the latest and greatest, well you had to wait a bit for it to become "stable" tag to use those. Not any more!
Starting today you can quickly and very easily change your widgets to use some other revision. The greatest part is that you can also use different embeddings (recorder and player) with different revisions of our system.
This is great if you want to move the player to latest revision and test how the recorder works in your form using the same.
Revision Options
We have described what we did and how that is helpful, however not how you can set it up. First, you will likely want to check this page: version history.
The page will show you the revision, the short information about what it brings and the date when it was pushed out. At the very top of the page it will also tell you which version is currently being used under "stable" tag.
You can insert:
"stable", "latest" - the available tags.
"r38", "r39", "r40", "r41" or any other revision. The important thing to note is the "r" with the number that you can find on the version history. If you add a value that is not recognized the widget will just show up as white field, so you will immediately know that something is wrong.
Sprechen Sie Deutsch? Parli italiano? Parlez-vous français? Do you speak English?
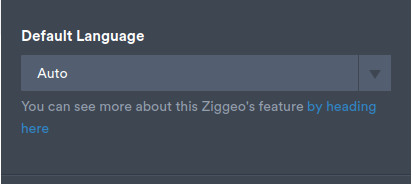
They are all the same, yet different language used. Some might seem familiar and some might not, and that is the beauty of our system, automatically adjusting to your preferred language. Of course now, with the option within your form, you can set the language to match the rest of your form as well.
The default is "Auto" since that will keep listening to the browser settings and set the language automatically to the preference of the person on your form. This brings the best UX. Of course, if you want to have more control over the overall design of your form, you can set this to be any language that you prefer to be used.
Making Changes to Translations
Having an option to change the language is great, however having the option to modify some words to your liking is even better. We know that sometimes the translations are good for general use, and that is how we designed them. All our translations of course have to match the needs for most of the people using the same.
So if you have a preference in using some alternative wording, now you can. Just make few modifications and that is it, you are using your language in a way you have preference for. How this is done exactly is something we will explain in the next section.
Making Custom Translations
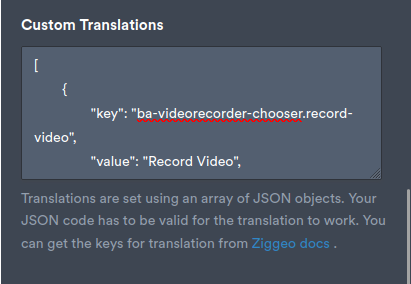
Translations are complex. You need to know the identifier for the string you want to change, the value you wish to change to as well as the language that you are changing.
Now you might also want to change one or more values.
To make this possible and as easy as we can, we need to use arrays and JSON objects.
Getting Keys
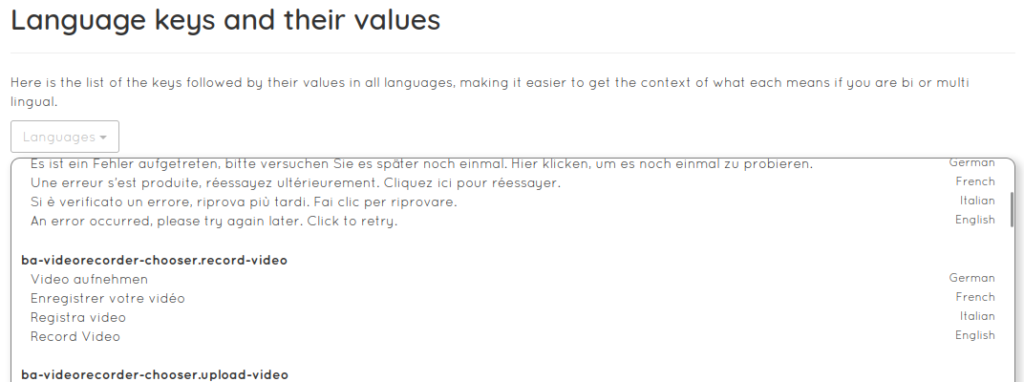
To get the keys you should first head over to our localization page. It will make it easy for you to find the same. Scroll all the way down on the page until you reach the section titled as "Language keys and their values". Everything above this section is not important for you as setting the object will do this for you.
If you click on the Languages dropdown you will be able to select the languages you wish to use. Just click on "All" to deselect all and then make it easy to pick one or two you prefer. This will make it easy for you to see quickly the values.
You can see the bold text representing keys, like "ba-videorecorder-chooser.record-video". This is the text that is shown on the "Record Video" button on the recorder itself, on the initial screen. Right under it also shows you the current translation with the language on the very right.
Forming the values
The values that you would end up with should look like this:
{
	"key": "ba-videorecorder-chooser.record-video",
	"value": "Record Video",
	"lang": "en"
}
As you can see, it starts with { and ends with its counterpart }. Between the two, you would always have "key", "value" and "lang" followed by their values, also within the double quotes. This means that your values must not include double quote.
Another thing to point out is the comma at the end of every line, except behind the last one for "lang".
You can combine as many of these objects as you want, just remember to add comma behind every closing curly bracket ( } ) that is followed by another opening curly bracket ( { ). In the end, put all of them within the pair of square brackets indicating that they are part of array.
This looks like so:
[
	{
		"key": "ba-videorecorder-chooser.record-video",
		"value": "Record Video",
		"lang": "en"
	},
	{
		"key": "ziggeoplayer.video-not-found",
		"value": "We could not find the specified video file",
		"lang": "en"
	}
]
What next?
Keep writing to us about what you would like to see in JotForm or any other integration. Even better, write your own suggestions on our page here: feedback.ziggeo.com where you can add your thoughts, comments as well as to vote up or down on some ideas others have made.
For anything else, please do reach out to our awesome support team.


