Creating the files required for your Ziggeo WordPress Plugin
For hosts with higher security settings on file creations
If you received a message in the plugin to come to this page, it means that the plugin had trouble accessing your filesystem directly through PHP and through the WP FileSystem.
This means that you have to go through the following steps manually. Please note that this is otherwise not needed and should no longer be used with version 3.0 of our plugin.
Creating the template data folder
This folder should be created within your plugins directory – usually your plugins are under wp_content/plugins. To create this folder, you can either create it on your local device and upload over FTP to your server or create it on the server directly. If you have created it on your drive, simply upload the same via FTP into the plugins directory. For your templates you will also need to upload a file named custom_templates.php into the newly created folder. If you have done that try to save a quick template. Don’t worry about the template name or content – you can easily edit or remove it at a later time. If it doesn’t work, please contact us by clicking on a contact us button below. You can also create it directly on your server.Step-by-Step Tutorial
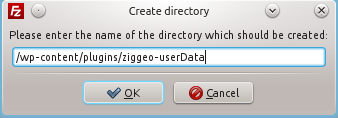
We will now go through the steps using an FTP client like FileZilla. 1. Go to the plugins directory. You should see the ‘ziggeo’ folder of your plugin. 2. Next to it and all your other plugins, right click and click on Create Directory option in the popup menu. 3. Name the directory as ziggeo-userData.
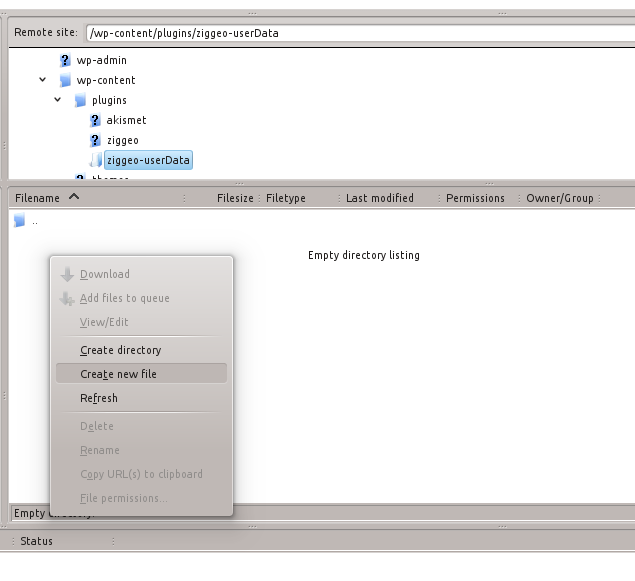
 4. Open the directory by double clicking on it.
5. Right click and select Create New File option.
4. Open the directory by double clicking on it.
5. Right click and select Create New File option.
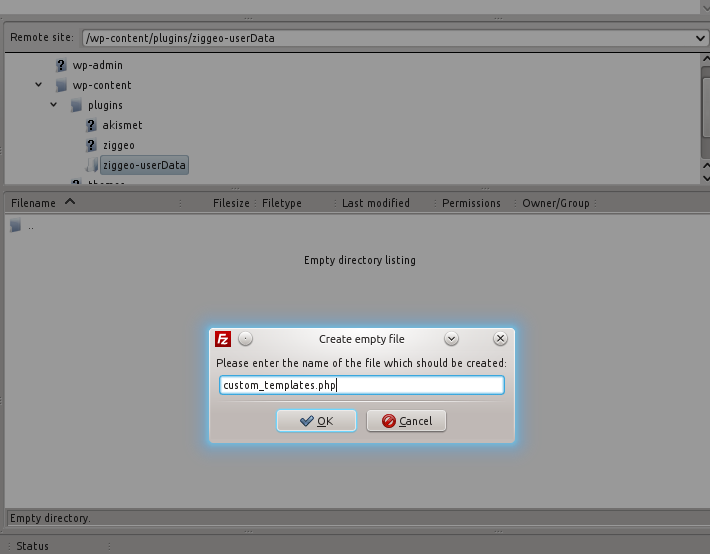
 6. Save the (empty) file as custom_templates.php.
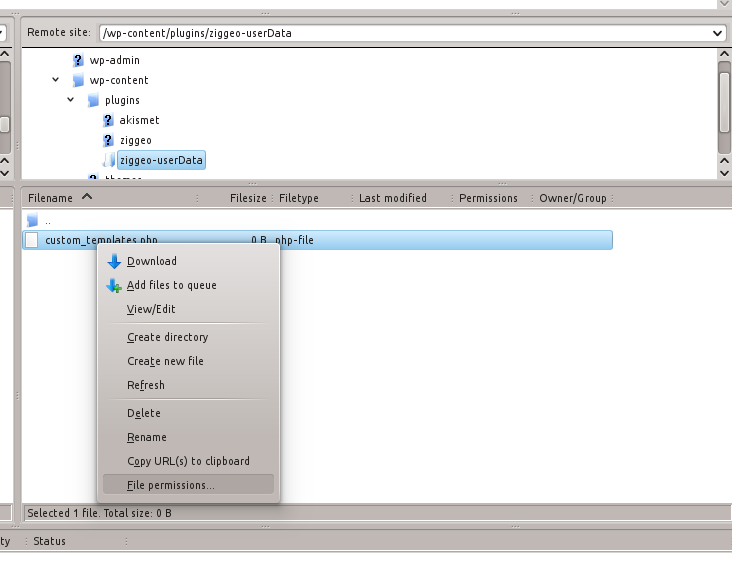
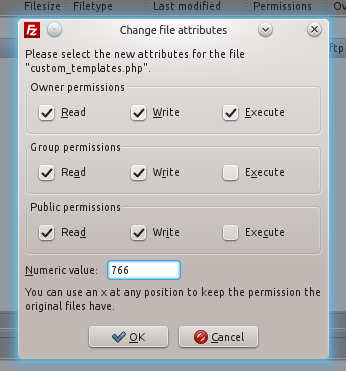
 7. Right click on the file and set its permissions to 766 or 666.
 If you have any questions just let us know through the contact option bellow.