Job Manager and Resume Manager addon integration
See info on Ziggeo to Job Manager and its addon Resume Manager integration
Ziggeo's Job Manager & Resume Manager integration
Ziggeo integrates into the Job Manager and its addon Resume Manager. There are simple options that allow you to fine tune what you want the integration to bring to your website.
The settings are split into settings affecting Job Manager and the settings affecting the Resume Manager.
We will explain all of them here as well as provide you with the info for the setup.
How to install
To bring these features to your WordPress website, you would need to install few plugins:
- the Ziggeo Video for Job Manager from WordPress repository.
- Our Core Ziggeo on WordPress.org plugin or the same from Ziggeo on GitHub.com repository.
- You will then need to install the bridge plugin that connects both plugins from step 1 and 2. This plugin is also available on WordPress.org as well as available on GitHub.
The ways you can install the plugins are described in the following docs: Installing WordPress plugins
- Should you use version from GitHub or from WordPress.org? That would depend on you. The plugins on WordPress offer you easy way of installing and updating through dashboard, while the versions on GitHub require you to update them manually. The versions on GitHub are however updated sooner and might offer additional features within the branches of the repo.
How to set up
Once installed and activated the plugin is ready to use. You might want to set things up so that your Job Manager and Resume Manager addon functions the way you want to.
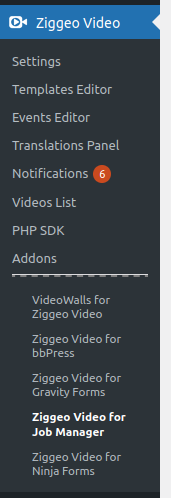
To get to the settings you can either click on the link within the plugins menu or by clicking on Ziggeo Video for Job Manager under Ziggeo Video menu.
There you will find all of the settings related to the integration.
Job Manager related settings
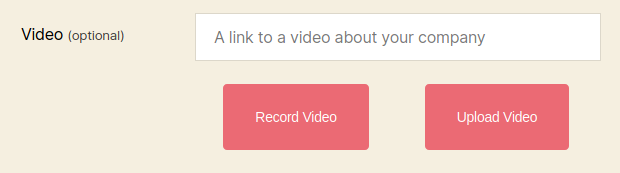
The settings available allow you to choose if the video recorder and video upload fields should be shown on Job Submission form as well as how.
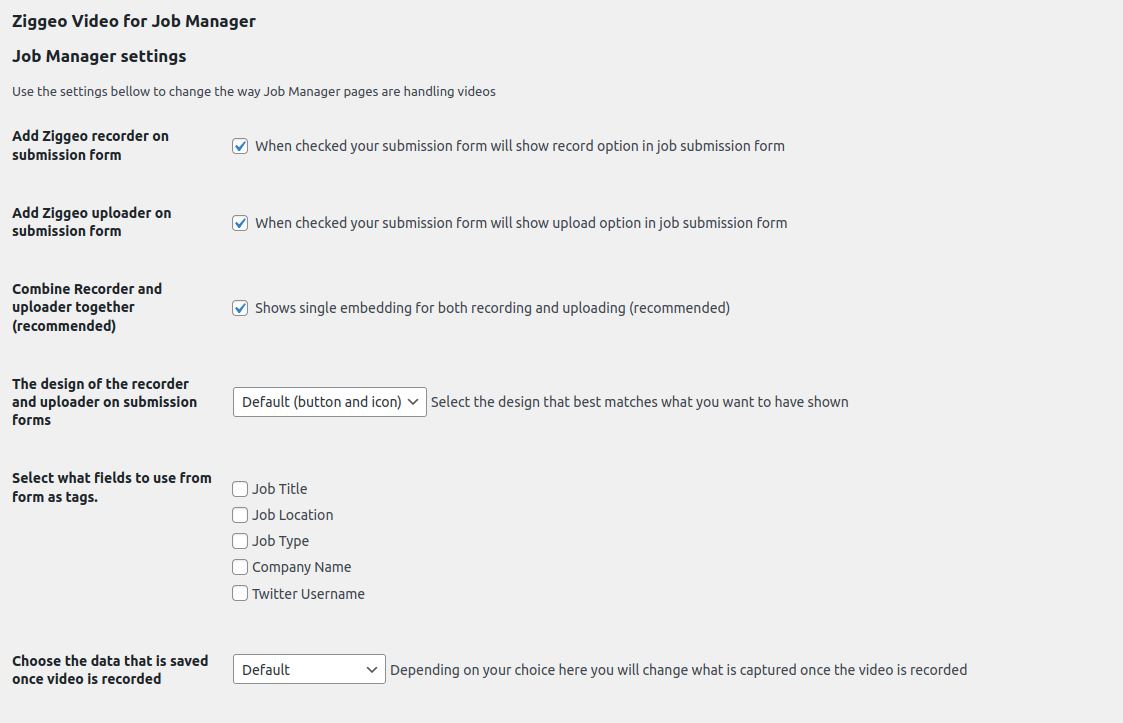
Here is a short info about each option provided:
- "Add Ziggeo recorder on submission form" - when checked the embedding on the Job Manager pages will have the record option shown. If unchecked, then it will not show the record option.
- "Add Ziggeo uploader on submission form" - When checked it will make the embedding show the upload option. If unchecked then the upload option will be hidden.
- "Combine Recorder and uploader together (recommended)" - In earlier versions of the plugin the above 2 options would dicate if you have one or two separate embeddings shown on page (one for uploads and another for recording). With this option checked, the above options are transferred into single embedding with specific setup.
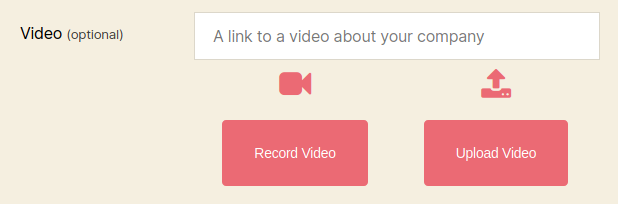
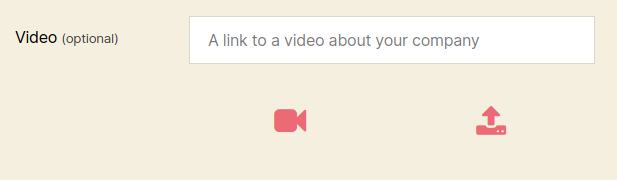
- "The design of the recorder and uploader on submission forms" - allows you to select how your buttons will be shown on the forms. Bellow you will find more details and examples of the embeddings. Please note that the design will likely be slightly different from what you see, depending on your settings.
- "Select what fields to use from form as tags" - This option allows you to add tags to your video. That way you can find the videos with same tags to use in your videowalls or when simply filtering the videos.
- "Choose the data that is saved once video is recorded" - This option allows you to choose the format of the data that is saved when form is submitted. Perfect when customizing your workflows.
Available designs
The design can be one of the following:
- Default (button and icon)
- Show Icons
- Show Buttons
The default is to show both button and an icon, however by changing this setting you can fine tune how the form looks.
Note: All styles can be affected by your own CSS, so if you want to change them, just add the CSS that you want to use.
Available Data Save Formats
The Choose the data that is saved once video is recorded option has several options to choose from. Here we will explain what they are:
- Default - Job Manager plugin was by default saving links to video so our bridge plugin follows the same concept by default to allow you to keep the same format if you are adding Ziggeo to existing setup. This means that each time the form is submitted, it will by default save the full link to the video.
- WP Embed code - The format is useful if you are going to be showing the videos on some other WordPress page. It will save the video information as a shortcode that looks like so - [ziggeoplayer]video_token[/ziggeoplayer]
- HTML Embed code - Similar to the above however it will save the HTML code of the player with the video token
- Video URL - Quite similar to the default however it is a bit different. The URL provided with this option looks like so
https://ziggeo.io/p/{token}which is a very short link, made for easy sharing. - Video Token - When this option is set the video token will be the only information that is saved. This is useful for utilizing the dashboard or to add into some template and alike.
Which option you select is entirely up to you. Each is designed to help deliver the format that works best for you and your existing workflows.
Note: You can change the option at any point in time, however all the previously saved details will not be modified. This setting only applies to the newly created videos.
Resume Manager related settings
The Resume Manager is an addon for Job Manager. In that sense, the settings for Resume Manager integration are seen as addons to the Job Manager integration settings.
What that means is that your Resume Manager integration will use the same design choice you made for the Job Manager. This results in same look & feel of the integration. It however does have its own options.
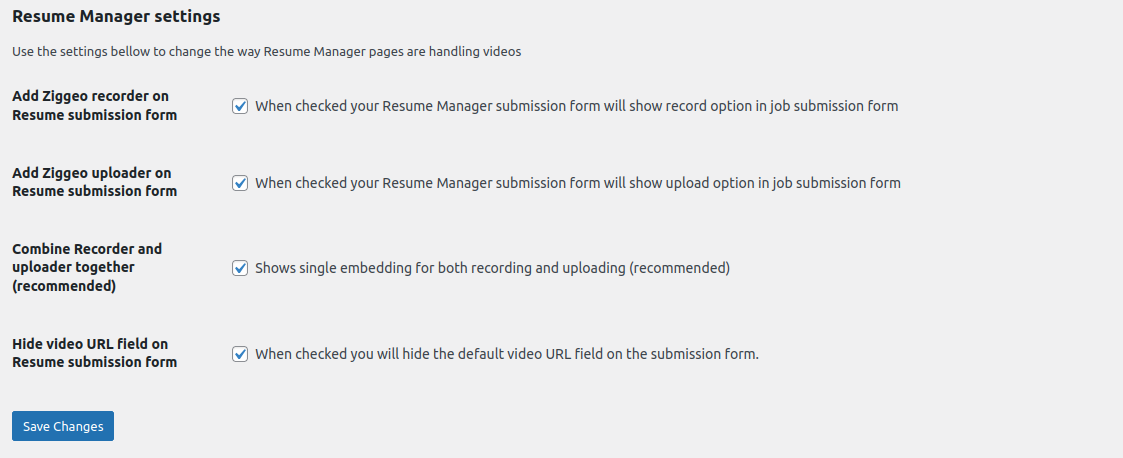
As you see the options are quite similar to what we have for the Job Manager allowing us to set up if we want the recorder, uploader or both as well as if it would be one or two embeddings.
Hide video URL field on Resume submission form option is to hide the short text field shown on your form. The benefit of leaving it shown is that someone can share the URL to the existing video hosted on any service.
The benefit of hiding the video field (leaving only integration choices) is that all your media is then in your Ziggeo account. While third party links can be easily shared, they can also be easily removed. Such action might allow you to see the video initially and then not be able to see it later on which is why many prefer to hide it.
By hiding the link field for resumes you make sure that your resumes always have a video you can show.